Tutorial for 3D printing with GeoGebra
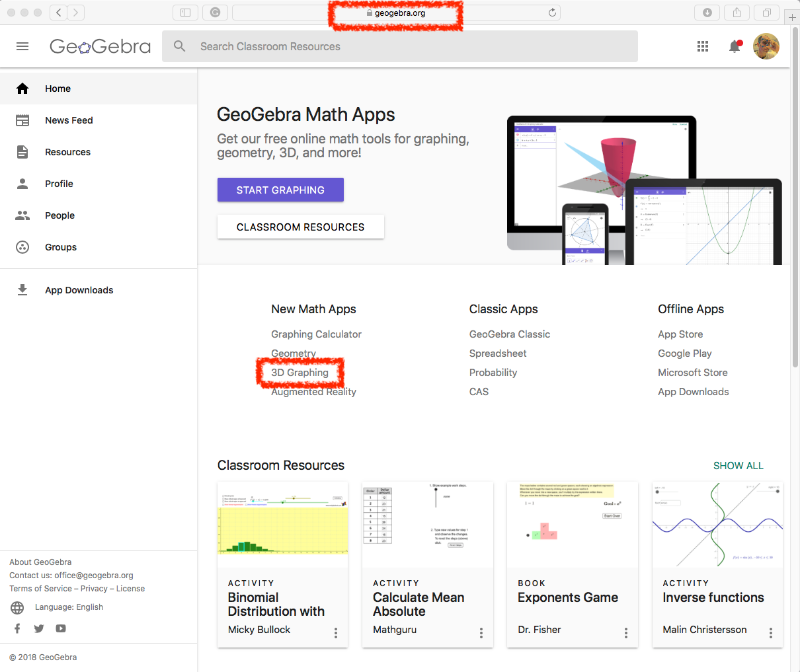
1) Access geogebra.org and choose 3D Graphing.
2) At the top left corner, you must open the Main Menu and then you can either create a New file or Open one that already exists.

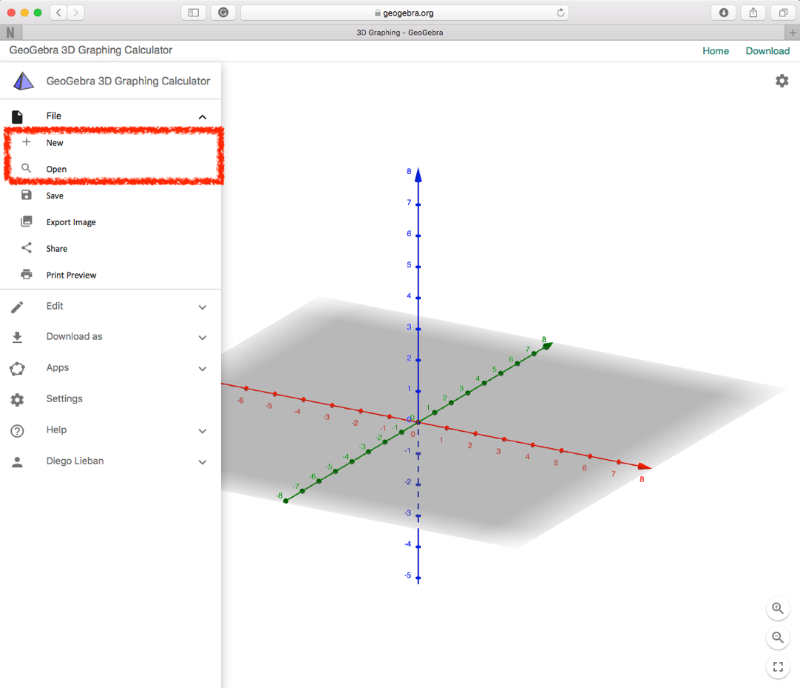
3) If you create a New one, you can either do through geometric constructions or algebraic descriptions.
![[size=85][size=100][i][color=#0000ff]note[/color][/i]: for those who are not familiar with proper GeoGebra algebraic syntax, we recommend starting from some examples available in [url=https://www.geogebra.org/m/pkfzccjw#chapter/314408]Samples[/url]. [/size][/size]](https://beta.geogebra.org/resource/wd8ahtj6/5lVS5brMczZh34X5/material-wd8ahtj6.png)
4) If you select Open, just pick one up and click in Edit.
![[size=100][i][color=#0000ff]note:[/color][/i] you can look for some materials through the [i]Search GeoGebra Materials[/i] bar. Typing [b]printable[/b], for instance, we got all options above.[/size]](https://beta.geogebra.org/resource/shswxz7m/hfhIYcBrMwTS487e/material-shswxz7m.png)
5) Almost done! After your editions, you basically have to export to STL. Again in the Main Menu, select the option Download as, choose STL and finally EXPORT your file.
NOTE: Be sure all elements that you want to print out are visible in the main screen as well as those you don't want to print out must be deleted or hidden, like the axes for instance.
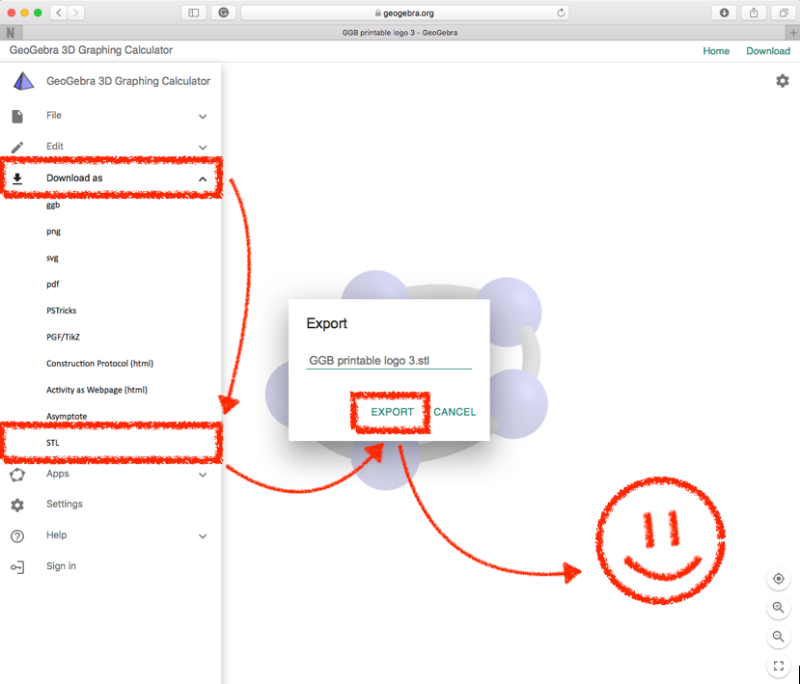
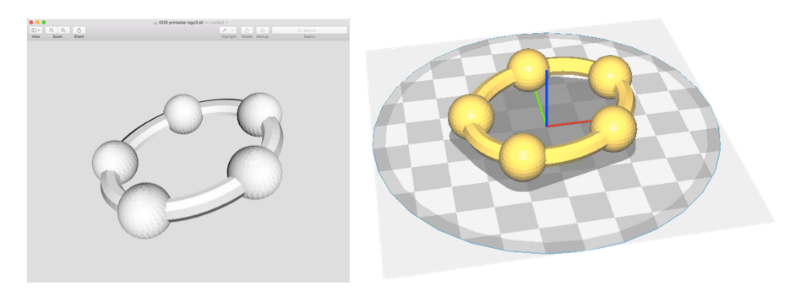
6) Next two final steps are out of GeoGebra. First, take a look if your STL is well done as the image in the left side bellow and then open it in your 3D software for final adjustments before you print out. You can find more details in Setting the 3D printer software.
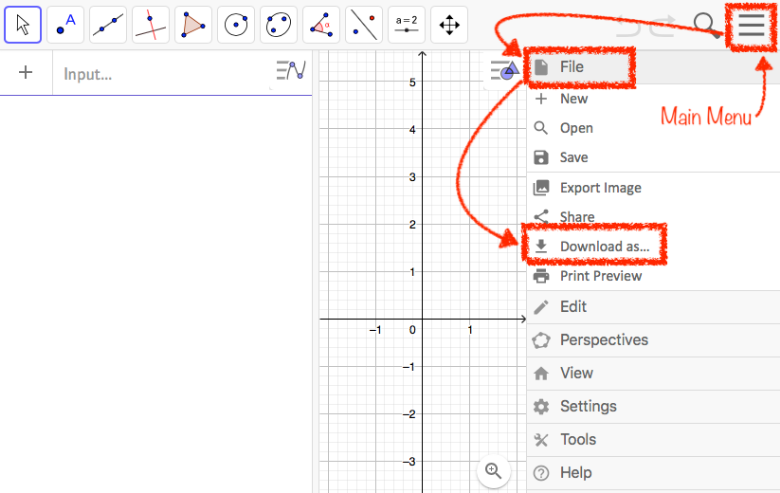
REMARK: you can also download as STL from others GGB apps, even though sometimes the way is a bit different. In GeoGebra Classic for instance, the Main Menu is now at the top-right corner. Then you'll find Download as in the File section, as shown below. Just explore it for other apps and have fun.
