AR Straight Line (ATM Workshop)
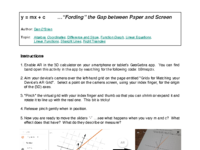
y = mx + c ..."Fording" the Gap between Paper and Screen
Printable Worksheet: y = mx + c with GeoGebra AR
Mapping onto the National Curriculum in England:
- Both Key Stages 3 and 4
- Algebra
- KS3: "reduce a given linear equation in 2 variables to the standard form y = mx + c; calculate and interpret gradients and intercepts of graphs of such linear equations numerically, graphically and algebraically"
- KS4: "use the form y = mx + c to identify parallel {and perpendicular} lines; find the equation of the line through 2 given points, or through 1 point with a given gradient"
Instructions
Note: If you have squared paper or graph paper and a ruler handy, you may wish to do the following activities without freehand sketching - this will still test your understanding of y = mx + c, but without the need for (as much) drawing accuracy.
1. On a blank piece of paper, sketch and label x- and y-axes. Try to make them intersect in the middle of the page and include all four quadrants by including their negative segments.
2. Using freehand, mark some equal intervals as accurately as you can on each axis and label them with appropriate numbers (e.g. -3 to 3 on each).
3. Sketch the graph with equation y = 2x + 1.
4. Enable AR in the 3D calculator on your smartphone or tablet's GeoGebra app. You can find and open this activity in the app by searching for the following code: p2gajjta.
5. Aim your device’s camera over your axes (which are in 2D on the page). Select a point on the camera screen, using your index finger, for the origin of the axes (which are in 3D on the screen - ignore the z-axis).
6. "Pinch" the virtual grid with your index finger and thumb so that you can shrink or expand the x-y grid and rotate it to line up with your real one. This bit is tricky!
7. Release pinch gently when in position. In the grid on your screen, click on the hollow orange circle to the left of the equation y = 2x + 1. The circle should now be filled in with orange and an orange line should appear on the screen, overlaid on your own graph, showing the correct graph for y = 2x + 1. How accurate was your sketch?
8. Now you can move the sliders  ...see what happens when you vary m and c? What effect does that have? What do they describe or measure?
9. Now see if you can improve your sketching skill and accuracy. In the same way, try to sketch and verify graphs for the following equations:
y = x + 2
y = 3x
y = 3
y = -x
y = -0.5x - 2
N.B. You might want to start again on a blank sheet if your drawn axes need improving or if you do not want to clutter up your original set of axes! If you put your device down to use pen or pencil and paper, first click the "3D" button on your device to toggle back to the 3D view without AR (otherwise the AR will no longer "see" your axes when you put it down and lose its place anyway). To get the AR view back, click the AR button and repeat the steps above to align your virtual and real axes on screen.
...see what happens when you vary m and c? What effect does that have? What do they describe or measure?
9. Now see if you can improve your sketching skill and accuracy. In the same way, try to sketch and verify graphs for the following equations:
y = x + 2
y = 3x
y = 3
y = -x
y = -0.5x - 2
N.B. You might want to start again on a blank sheet if your drawn axes need improving or if you do not want to clutter up your original set of axes! If you put your device down to use pen or pencil and paper, first click the "3D" button on your device to toggle back to the 3D view without AR (otherwise the AR will no longer "see" your axes when you put it down and lose its place anyway). To get the AR view back, click the AR button and repeat the steps above to align your virtual and real axes on screen.The video below shows how to align the AR view with a sketch of y = 2x + 1:
Sketching y = 2x + 1
N.B. Another variant of this activity (which our group presented at the BSRLM Summer Conference 2022 and is available here: https://www.geogebra.org/m/b9msqrzx) is to provide pre-printed Cartesian grids, the first one of which contains the orange line for y = 2x + 1. Students can then match the overlay exactly with this grid and investigate the effect of slider manipulation for m and c. They can also physically plot a few given points onto blank grids of the same size and overlay the same AR manipulative, then alter m and c to get the orange line to pass through them all. Reading the equation shown adjacent to the camera view might enable students to better understand how the relationship between the x- and y-coordinates is encapsulated within it.
Extension Task 1 - Find the Equation of a Line Intersecting Points using AR
1. Press the "3D" button on your device to toggle back to the 3D view without AR and put your device down. Sketch a new set of axes with values ranging from -6 to 6 on each. Now, physically use a pen or pencil to plot the following coordinates:
(0,1)
(2, 2)
(6,4)
2. Now you can re-fix the device's axes to your graph: move your device over to it, then enable AR again, repeating the above steps until you have matched the virtual and real grids as before.
3. Experiment with the sliders to see if you can find a straight line that intersects these three points.
4. What is the equation of this line?
5. Can you use this equation to find another two points on the line? See if you can use it to give at least two points in the quadrant where both x and y are negative.
N.B. You can also enter those coordinates, as they are written, into the virtual grid on your device - if your drawing was accurate enough and you plotted them correctly, they should appear as dots in the same places!
Extension Task 2 - Instructions for Content Creation
If you wish to construct the line only in the 3D GeoGebra Graphing Calculator app on your smartphone or tablet, you will need to project a vertical plane generated by the equation "y = mx + c" onto the x-y plane:
1. Open the app.
2. Ensure you are in "Algebra" view (select "Algebra" on the bottom-left of the screen).
3. Click where it says "Input..." and type in the equation "y=mx+c" and press return (you will need to select the "ABC" menu to write the m and c; the other characters are available in the "123" menu).
4. A vertical plane should appear, intersecting the x-y plane with a straight line.
5. To mark that line, toggle view to "Tools" (select "Tools" on the bottom-right of the screen) and select "Intersect Two"  . Now simply select both the vertical plane and the (grey) x-y plane.
6. To hide the vertical plane, go back to "Algebra" view and click on the coloured bullet-point toggle to the left of your equation "y=mx+c".
7. Note that sliders for m and c were automatically created when you entered the equation of a straight line. You can move the sliders and achieve the effects in the above applet by revealing the line as in step 7 above. If you adjust the 3D orientation with your finger/thumb and enable AR, you can try to line up the x-y plane with axes drawn on a page, as in the previous task. If you draw a straight line on those axes, can you use the sliders to match it? What does this tell you about m and c?
In order to customise your view:
8. To hide the grey horizontal x-y plane, change settings by clicking on the black cogwheel icon on the top-right of the screen. Toggle the "Show Plane" button. You can also toggle the "Show Grid" button for the grid.
9. See if you can also un-colour the axes and fix the numbered interval distances on each axis to 1 - which settings option will enable this?
10. You can alter the sliders' properties (name, Min and Max, increment, colour etc.) by clicking on the three vertical dots to the right of the slider). You can alter the marked line's properties in the same way.
11. You can also colour the marked line by selecting it with your finger and using the flood icon to the left of the menu that appears at the top of the screen. A colour palette will appear for you to choose from. What else can you do to this line?
. Now simply select both the vertical plane and the (grey) x-y plane.
6. To hide the vertical plane, go back to "Algebra" view and click on the coloured bullet-point toggle to the left of your equation "y=mx+c".
7. Note that sliders for m and c were automatically created when you entered the equation of a straight line. You can move the sliders and achieve the effects in the above applet by revealing the line as in step 7 above. If you adjust the 3D orientation with your finger/thumb and enable AR, you can try to line up the x-y plane with axes drawn on a page, as in the previous task. If you draw a straight line on those axes, can you use the sliders to match it? What does this tell you about m and c?
In order to customise your view:
8. To hide the grey horizontal x-y plane, change settings by clicking on the black cogwheel icon on the top-right of the screen. Toggle the "Show Plane" button. You can also toggle the "Show Grid" button for the grid.
9. See if you can also un-colour the axes and fix the numbered interval distances on each axis to 1 - which settings option will enable this?
10. You can alter the sliders' properties (name, Min and Max, increment, colour etc.) by clicking on the three vertical dots to the right of the slider). You can alter the marked line's properties in the same way.
11. You can also colour the marked line by selecting it with your finger and using the flood icon to the left of the menu that appears at the top of the screen. A colour palette will appear for you to choose from. What else can you do to this line?